Remote Desktop (RDP)
On this page
The table of contents requires JavaScript to load.
Users can connect to CHPC Windows resources via remote desktop protocol (such as Beehive, beehive.chpc.utah.edu). There are different options depending on the operating system of the local machine (your desktop or laptop) from which you ar connecting. A short training video covers remote desktop connections from various operating systems. For help with connecting to CHPC resources via a Remote Desktop Connection (RDP), please contact helpdesk@chpc.utah.edu.
When not on campus, you must first connect via the campus Virtual Private Network (VPN) before you can use RDP.
Windows
Since RDP is a product of Microsoft, connecting over RDP is very straightforward on Windows machines. Users can search for "Remote Desktop Connection" in the start menu. An application will open and present the user with a prompt. Put the desired resource in the Computer field (i.e., beehive.chpc.utah.edu) and click connect.
These steps are show below for both Windows 7 and Windows 10:
Step 1: Launching the application
There are a couple different ways to launch the RDP application.
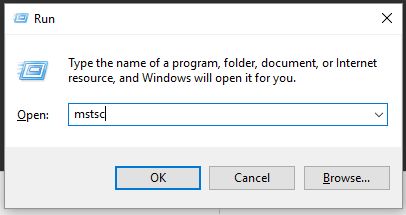
On Windows 7, you can go to Start > All Programs > Accessories > Remote Desktop Connection. You can run the following command (click on the Windows icon in the toolbar and select run):
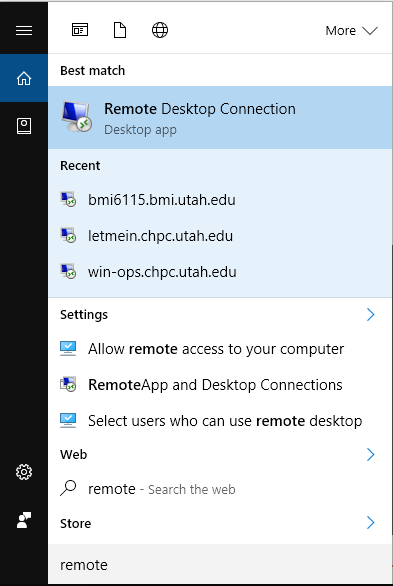
On Windows 10, you can search for the application by typing in "remote" in the "Search the web and Windows" filed on the toolbar,
as shown below
Step 2: Configuring the application
Once the application launches be sure to enter the full computer name in the Computer field. For example, enter "beehive.chpc.utah.edu" not "beehive".
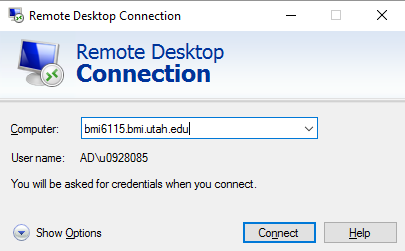
Before hitting enter or clicking "Connect" you want to click on "Show Options". Then click on the tab for "Local Resources" and click "More…"
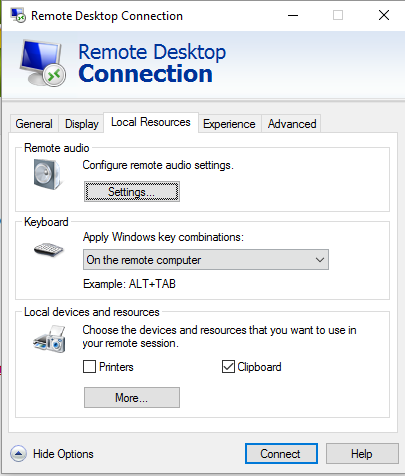
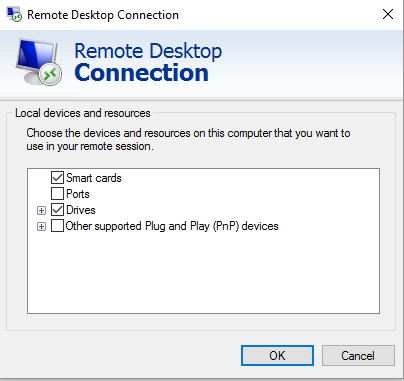
In the pop-up window you can select local drives that you would like to redirect and mount on the remote server to which you are connecting. Click "OK" and then "Connect".
Step 3: Credentials
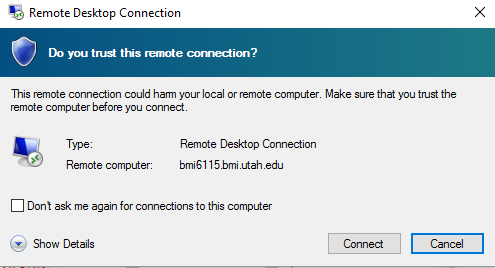
You might receive a prompt like the following; verify the remote computer name again and click "Connect".
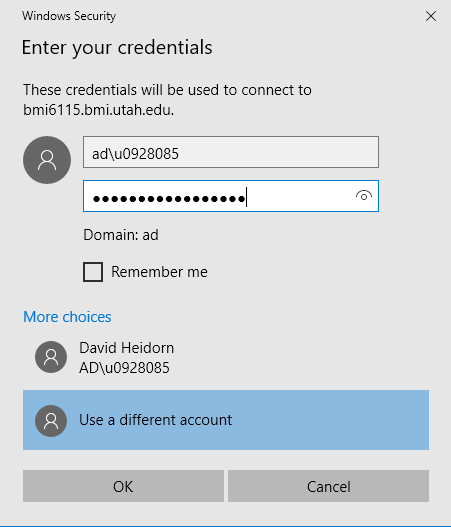
In the name field be sure to enter "ad\uNID"; replace "uNID" with your uNID and the password will be the one you use for CIS. Click "OK".
For more information, please visit the following link: Remote Desktop Connection.
Mac
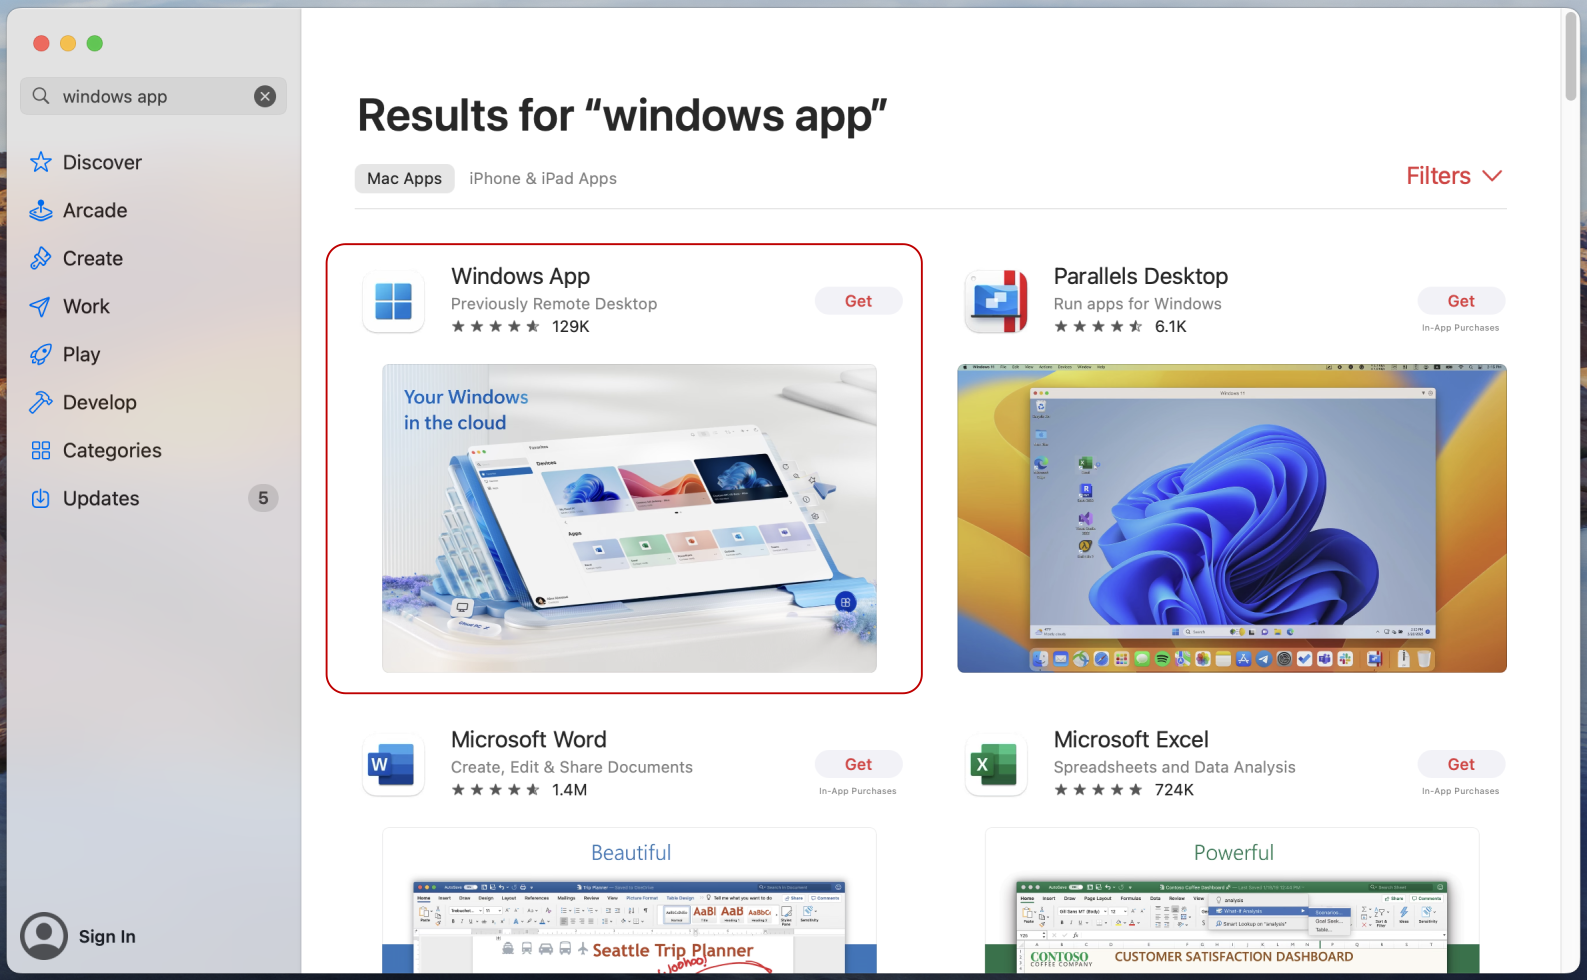
The recommended application is the official and free "Windows App" program (previously Microsoft Remote Desktop), which can be found in the Mac App Store.
Step 1: Get the application
You can get the application by searching "Windows App" as shown below; it is the first listed application, shown with a red box.
Step 2: Configure the application
When launching the application you will first need to configure you connections by clicking on "+" icon

The following need to be filled out, the rest can be left as defaults.
PC name = use the full computer name. For example, "beehive.chpc.utah.edu" not "beehive"
Friendly name = any alias or nickname you wish to give the connection (optional)
You can redirect local folders from you mac under the "Folders" menu. (Please note this is prohibited inside of the PE)
Additionally, you may want to verify that clipboard is selected under "Devices & Audio"
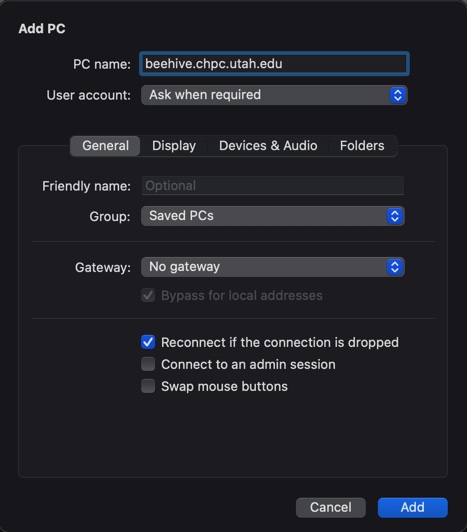
Then close the menu by clicking "Add" after which you should be able to launch your newly created connection.
Your sign in will be "AD\unid" with your CIS password. (replace unid with your user account)
Linux
Linux has an application built in called "rdesktop", which can be accessed from the command line:
rdesktop beehive.chpc.utah.edu
Some useful options that users may be interested in are: -u (username), -d (domain), -a (color depth), and -g (graphics resolution). An example of these options compatible with a 1280x1024 resolution monitor is given:
rdesktop -u u0123456 -d ad -a 32 -g 1200x960 beehive.chpc.utah.edu
xfreerdp -u u0123456 -d ad.utah.edu -f beehive.chpc.utah.edu


